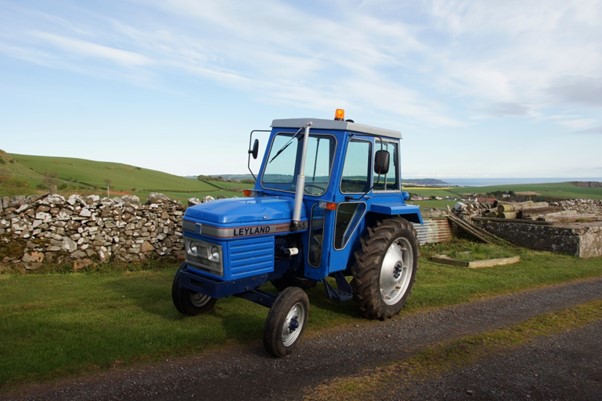
When you get to putting the decals on the bonnet of your Leyland tractor, you know that the restoration is nearing the end. After painting the decals are the final finishing touches to the exterior of the tractor and they can make a difference.
Leyland tractors, both the rattle cab tractors and the Quiet-cab tractors, have decals going down the side underneath the bonnet and around the front of the nose cone.
Different colourways
Some of the different Leyland models have different colourways of decals.
Leyland 154
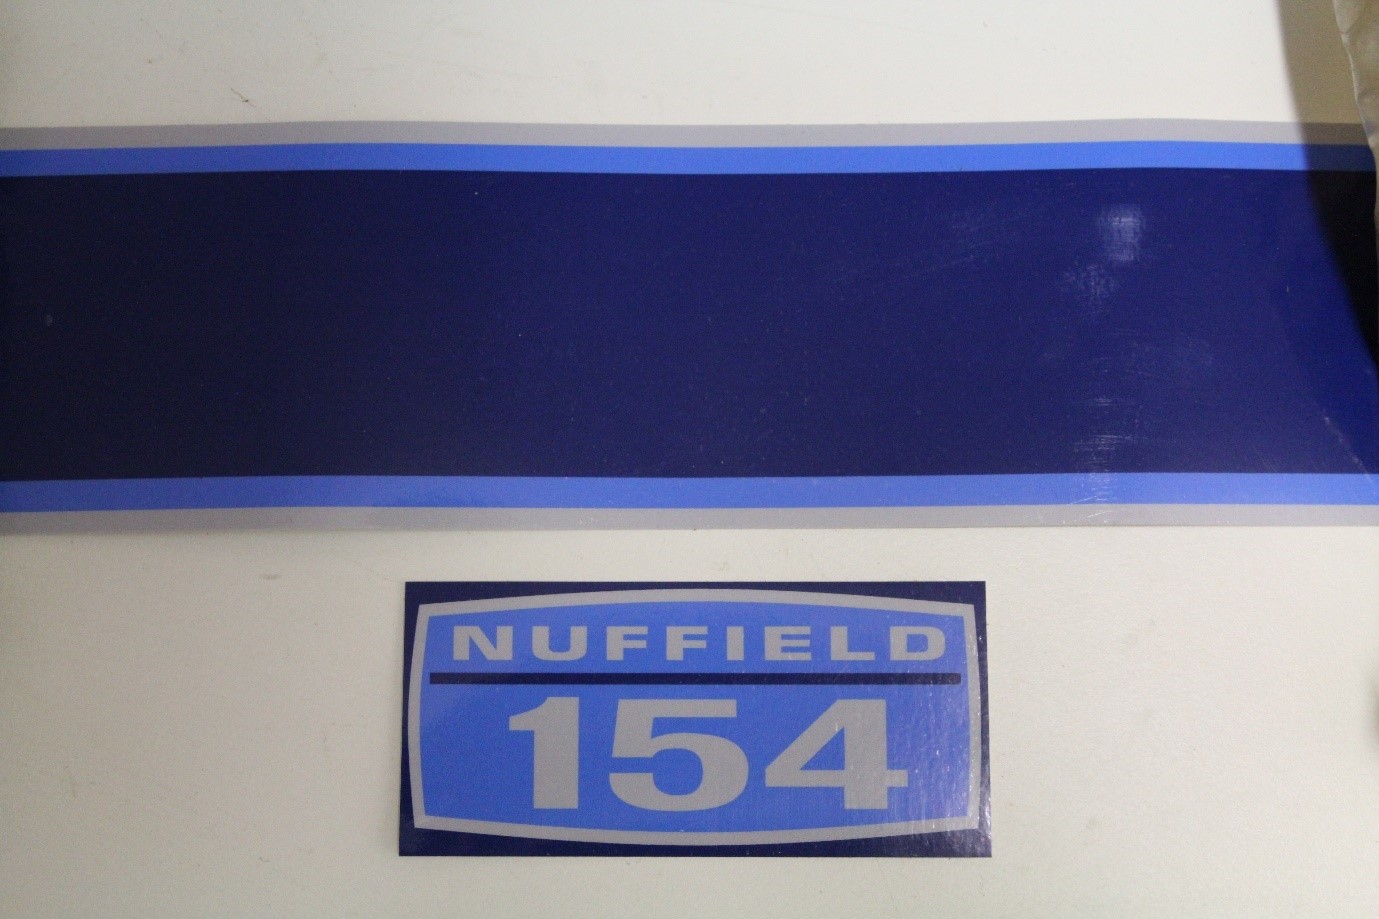
Let’s start with the Leyland 154, the Lightweight tractor with the 1500 Diesel (or the 1622 cc petrol engine, although not many were made for the UK market). The early Leyland 154 tractors had dark blue decals with the light blue tripe top and bottom and a silver stripe on the edge. The wording on the small number sticker is ‘Nuffield 154’, which gives it away that this colourway of decal is fitted to the early Leyland 154 tractors. You can buy these decals by following this link.
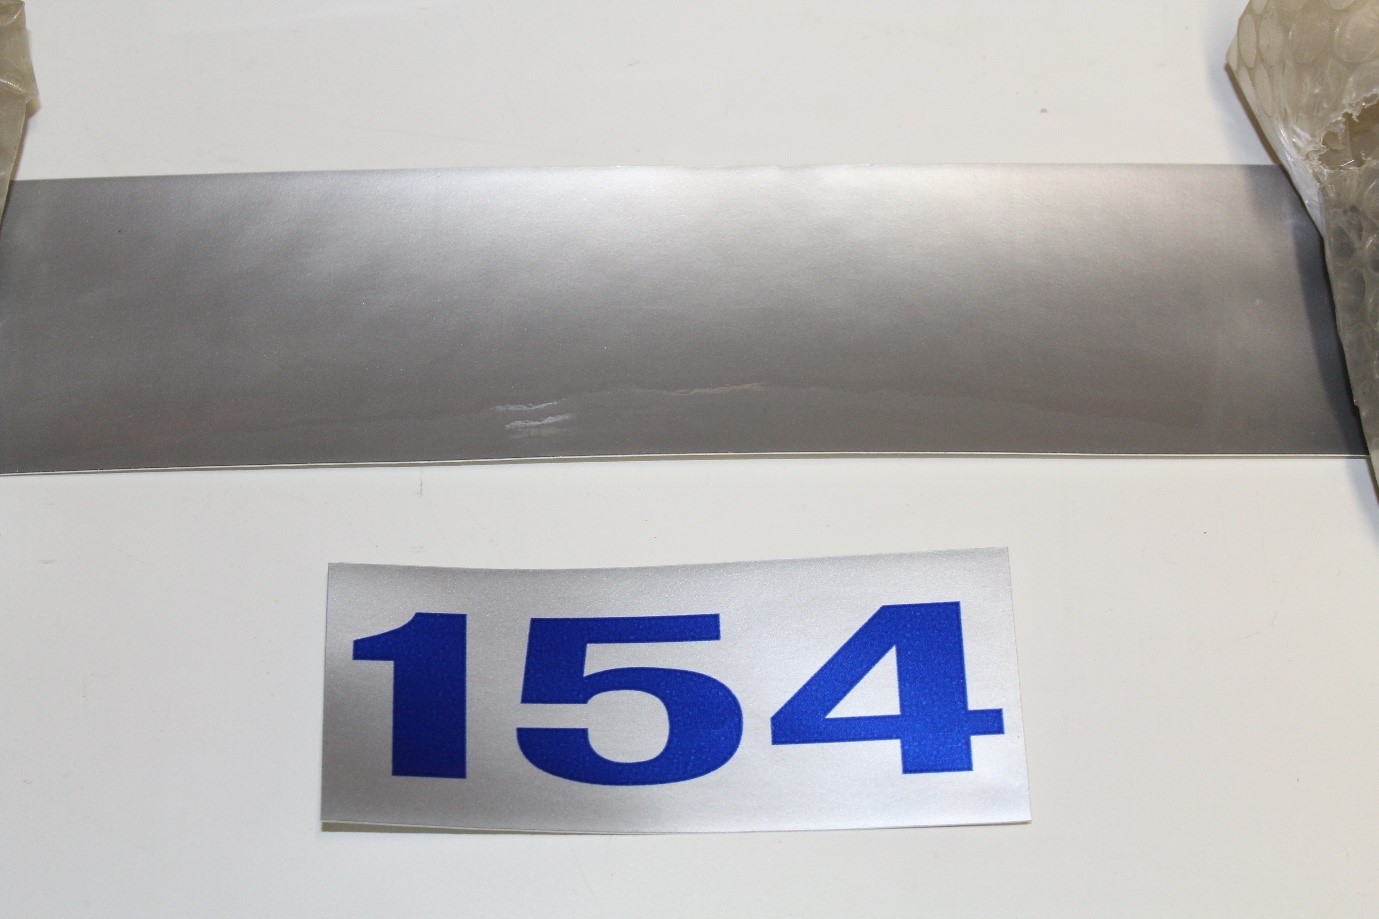
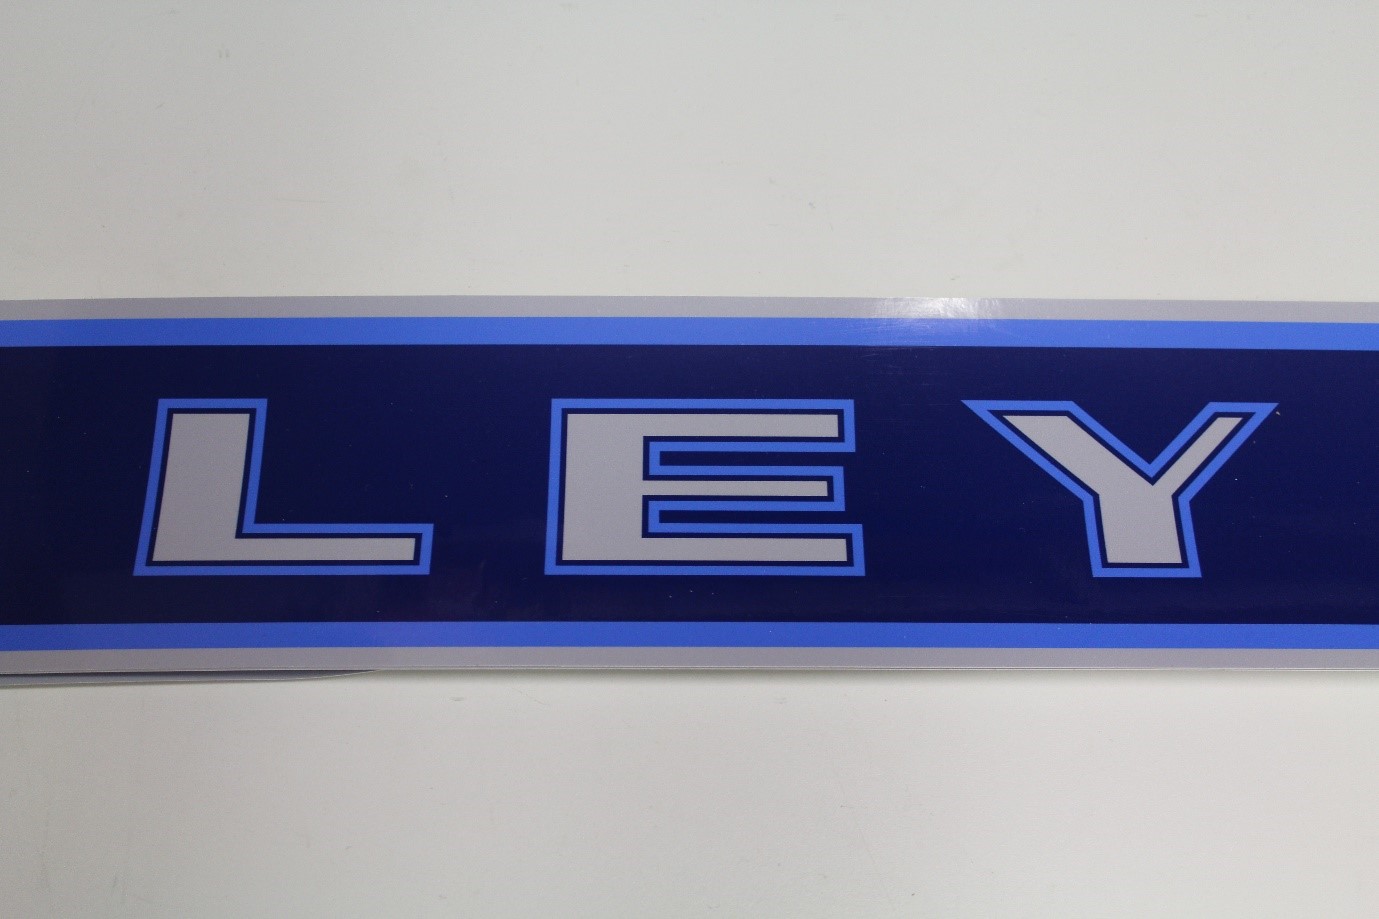
The later Leyland 154 tractors had a silver band down the side of the tractor underneath the bonnet and ‘Leyland 154’ is written on the decals. The word Nuffield was dropped at this change point and the colour scheme has been changed. You can see the details of this decal set in this link.
According to the part book this change point is at tractor with serial number C13725. So, tractor C13725 had the blue decals with the word Nuffield, and tractors C13726 onwards had the silver band.
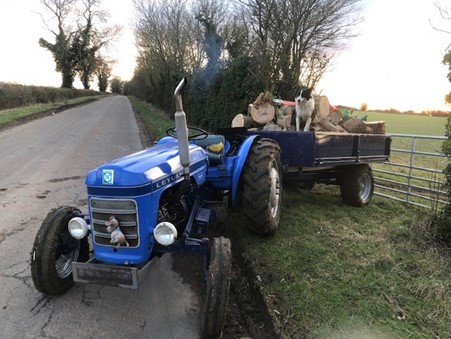
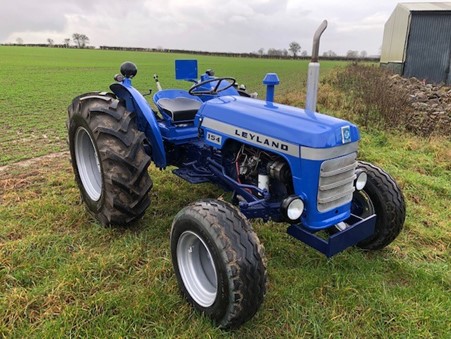
This colour scheme totally changes the look of the tractor, and it is strange how such a small change can make a big difference. Below are two of our customers tractors and you can see the difference that the decals alone make to the look of the Leyland 154 tractor.
Leyland 344, Leyland 384 and Leyland 253 models
The larger middleweight range of tractors also had change points of the decals, so I will quickly go through the different changes.
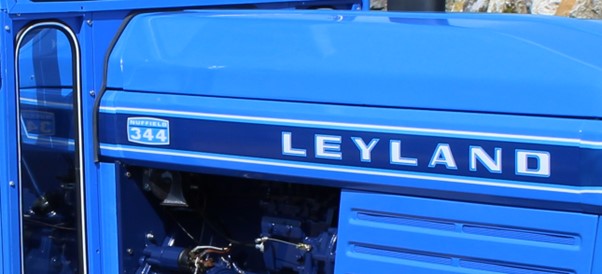
The Leyland 344 and Leyland 384 models as well as the Leyland 253 models are quite easy in the changes, as the colour of the decals stayed the same with a dark blue background, with a light blue stripe and silver writing and a silver stripe at the edge.
The difference between the early and the late models is the small print saying the number which is located at the back of the bonnet. The early models say ‘Nuffield’ and then either 344, 384 or 253 and the later models say just the model number ‘344’, ‘384’ or ‘253’. These later models did not have Leyland against the small number, as it is written in big letters down the side of the bonnet, so there was no need. I guess this allowed the model number to be increased in size.
The parts book gets very complicated with the decals and the change points, and it suggests that the change for the majority of the Leyland middleweight models to drop the wording of Nuffield is after tractor with serial number C208332.
Leyland 255 and Leyland 270 models
They Leyland 255 and Leyland 270 models only have one option for the decals. This option is basically the same style as the late Leyland 253 models, with the dark blue background, light blue stripe and silver writing and a silver edging. This makes it nice and simple when choosing the decals for the outside of the cab. By the time that these models were being made the Nuffield name had been resigned to the history books and Leyland was an established brand, so they dropped the Leyland/Nuffield combined branding, and just went with the Leyland branding and the one colourway.
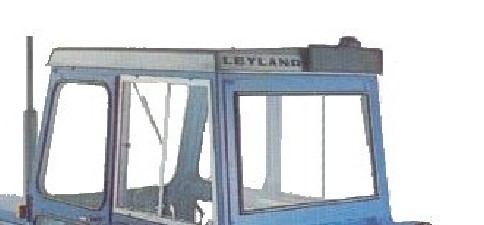
It is worth pointing out that these cabbed tractors had a decal on the back of the cab which had the words ‘Leyland’ on it. This colour scheme matched the decals that were fitted down the side of the bonnet and had the dark blue background with the light blue stripe and silver writing. These decals have their own part number, in this case CTJ71, and can be purchased separately from the decal set for the whole tractor as if you are replacing just the roof then you may want a new decal for the roof.

Leyland 245
Whenever anybody calls for parts for a Leyland 245, I always say that this is the most complicated model for change points etc. This is not just in respect to the decals, but across the tractor as a whole. The Leyland 245 model has many options. It could be fitted with the earlier rattle cab, and it could be fitted with the Quiet cab. It can have the 5x2 standard gearbox and it can also be fitted with the 3x3 Synchro gearbox, so there are a lot of different options for the Leyland 245 model.
This is no different for the bonnet decals, where there are 3 variations – dark blue background with silver writing, silver background with dark blue writing and then the silver background with blue writing and red stripes and ‘Synchro’ writing. See below for the different options.

The first option is the Dark Blue background with the light blue stripe and silver writing and a silver edge, and you can see this decal in the link here. This decal is found on the early non-synchro models with the 5x2 gearbox tractors from serial number C168256 up to C208332.
The decals with the silver background and the dark blue writing are fitted to the Leyland 245 models with the 5x2 non synchro gearbox from Serial number C208333 onwards. This colour scheme is fitted with the rear cab roof decal that matches this colour scheme, which is part number CTJ5854 or CTJ7675. This is a silver background decal with the dark blue writing and this decal goes on the back of the cab roof.
The later Leyland 245 were a Synchro model which had the 3x3 gearbox. This made many differences to the tractor, such as being fitted with the later Quiet cab, the later headlights and grille and, of course, a different colour scheme for the exterior decals. These Synchro Leyland tractor decals have a silver background with a red stripe top and bottom. They then have the word ‘Synchro’ down the side of the bonnet too.
This silver background with a red stripe colour scheme is used across the whole of the Leyland Middleweight and Leyland Heavyweight range of tractors to dictate that these tractors have the Synchro gearbox. It makes it easy to distinguish between the Synchro and Non-Synchro models, with the red colouring showing up nicely against the silver and the blue panels.
Leyland 262 and Leyland 272
The Leyland 262 and Leyland 272 models had an option of either the 5x2 crash box or the 3x3 Synchro gearbox, so the Leyland 262 and 272 models were clad out with decals that had silver background and dark blue writing, either with or without the red stripe top and bottom and the Synchro wording.

Leyland 282 and 482
These 82 horsepower tractors were fitted with the Synchro colour scheme only.
Leyland Heavyweight range – Leyland 285 and 485, Leyland 2100 and 4100
The Leyland Heavyweight range of tractors are the range fitted with the 6-cylinder Leyland 6/98 engine, so the 285, 485, 2100 and 4100.
In terms of bonnet decal colours these models had a choice of 3 options – the early dark blue background, the silver background with dark blue writing or the Synchro colour scheme. It follows the same rules that the Synchro models had the red stripe. The early tractors had the dark blue background and the later tractors had the silver background with the dark blue background. For the Heavyweight tractors the change point for between the dark blue background and the silver background is tractor with serial number C208644. Tractor with serial number C208645 onwards had the silver background.
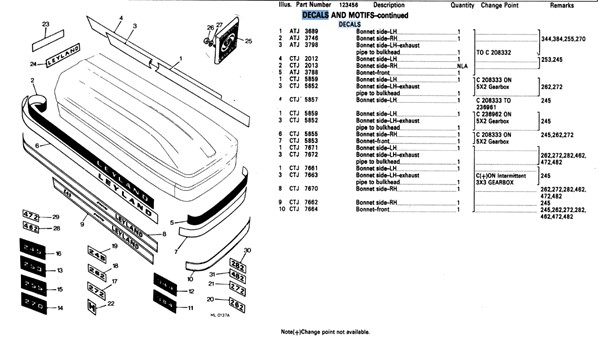
Below shows a page from the parts book that shows the change points and why it can be so complicated when we look in the parts book and try to work things out. There are so many decals that make up the kits, and nowadays a lot of them are printed together to make application easier. For example, the numbers of the models are now no longer a separate decal, but printed onto the long decal that goes down the side of the bonnet.

Leyland tractors generally follow an easy rule for colour scheme
Once you realise the reasons for the change points of the colour schemes that Leyland introduced then it is easy to establish which colour your tractor should have for its exterior decals. However, by far the easiest way is to remember which colour decals it had before you stripped the paint! We always say that pictures mean 1000 words and when undertaking a restoration project this is a good example of where it pays to take pictures as you are dismantling your tractor. Not just for exterior decals, but for interior decal placement and options too.
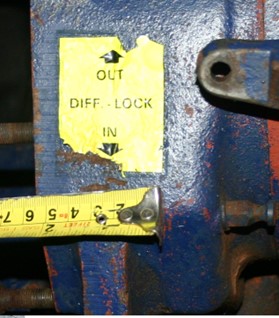
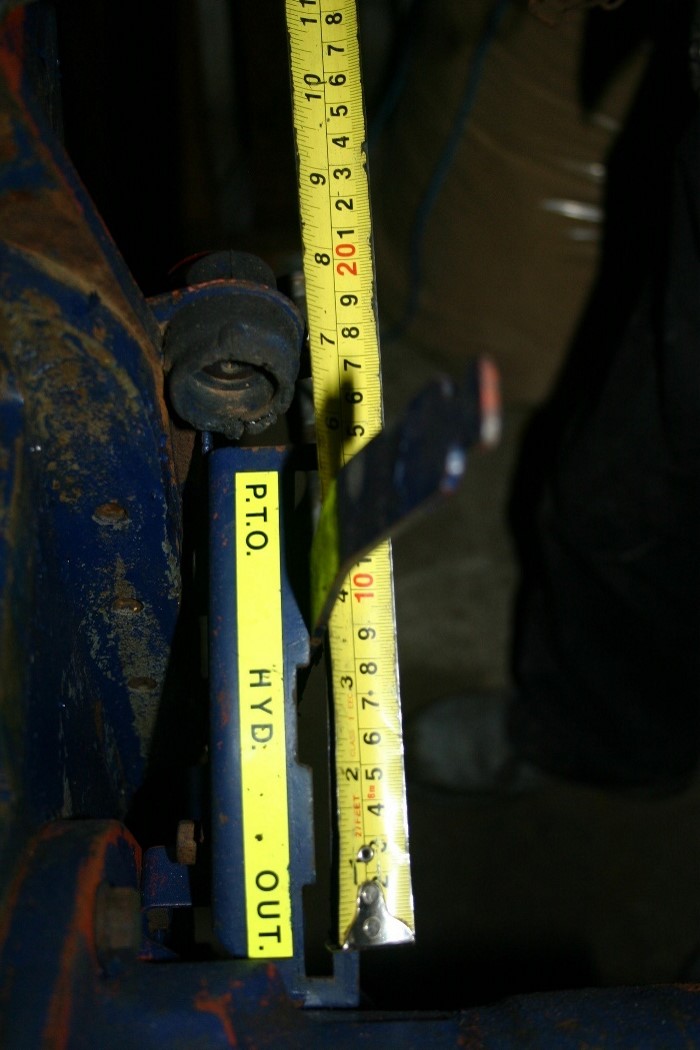
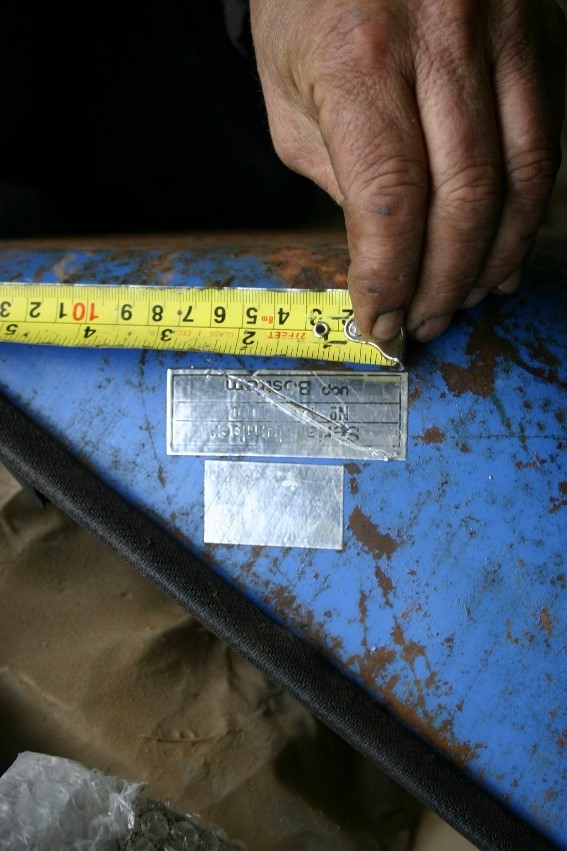
Here at Tractor Spare Parts Ltd, we have the odd tractor through our workshop and we have folders and folders worth of pictures of the tractors as they came to us. Many of them show decals with a tape measure next to them, so that when we come to put it back together, we already have all of the information.
How do you put the decals on?
This is the ultimate question and one that people can get very frustrated about. It is without a doubt that putting decals on the tinwork of tractors is a very nerve-wracking job and unfortunately it is one that practice makes perfect. By the time you have done your 10th Leyland restoration you should be good at them!
The good news is that we have done this before and we also have spoken to customer who do it a different way and I will try to explain below some hints and tips. Normally with things like this I would make a video and post it on our YouTube channel, but I am sure that there is far too much swearing, cursing and things going wrong to do a video on this subject. You do have to be in the right frame of mind to do this job and patience and plenty of time is the key, so maybe next time we are doing a set of decals we will think of doing a video.
The modern decals are printed all in one piece so there is no putting number decals on top of the long strips, which makes it easier. Unlike the Marshall decals that are made up of the different width strips of different colours, the Leyland decals are relatively easy to do.
Positioning the decals
The key with the decals is positioning. Not only getting the left and the right-hand side the correct way around, but also making sure that the number portion of the decal is where you want it to be; hence the photographs before you stripped the tractor.
The most important positioning is top to bottom, especially with the long decals that go down the side of the bonnet and around the front of the nose cone. These three decals must match up all the way around the bonnet and to make it look right takes a bit of organisation. The best thing to do is to mark out the centre of the panel top to bottom. I believe that if you mark 15 mm from the top crease. Mark all along the top of the long side panels 15 mm from the top by putting dots along the length of the panel. You will use these dots to apply the edge of the decal. This way you know that it is going to match up all the way along. You can also mark the bottom of the panel in the similar way, so you have marks top and bottom to guide you with positioning.
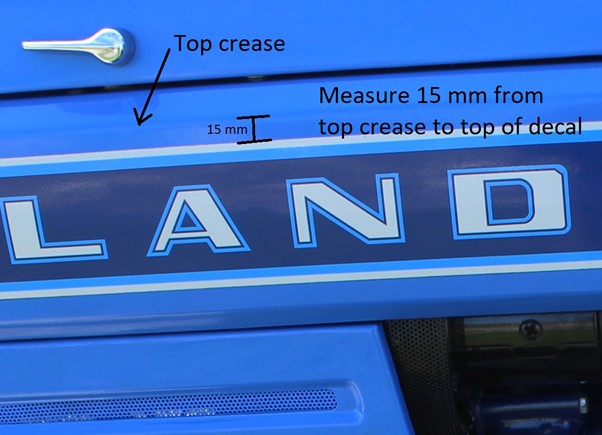
To mark out the front nose cone decal you must have first put the decals on to the long side panels. This way you can put all three of these matching panels onto the tractor and tighten up the bolts to their final position. This way you can visualise where you need to mark on the front surround panel where the top and bottom of the decal should match up and use these measurements to mark evenly across the front length top and bottom. Measure from the top crease as shown in the previous picture when marking the front surround out as this will make it look right.
This front surround panel is curved both left to right and top to bottom, which makes this the most difficult decal to fit. It is also the decal that you see from the front of the tractor, so you want to make a good job of this one. (If you do make a mess of this front decal, we understand; we have all been there. We do keep a stock of the different colourways of the front decal only, which saves you purchasing a complete new set. Contact us for more details.
We recommend that when it comes to actually sticking this front decal down that you start with the middle and make sure the middle is firmly down, then work on one side and then work on the other side. It is always handy to have a friend with you too for this job, just in case!
Sticking the decals down
There are two ways to stick the decals down, and I must admit we have only done it one way and never tried the other method, but it is all what you are used to.
The first way that we have done is to unpeel the backing from the decal and just stick it down. You can reposition the decal to a certain degree and pull it off again, but this can stretch the decal a bit. We then use gentle heat from a hairdryer of similar heater to heat the decal to shrink it slightly to ensure that there are no creases of extra material. This heating is most important on the front surround panel where you have two directions of curve to accommodate. You can stretch the decal to make it fit nicely around the corners, but you must remember that if you pull and stretch it too much you will have to heat shrink back way more material, so try not to reposition it too much.
The second way and the way I have heard a lot of people apply the decals is by using soapy water. The idea is that you can float the decal over the surface of the panel to get it in the right position, before using a credit card (or similar plastic card) covered in a clean, soft cloth to squeeze out the water and air bubbles while it is in position. You do not need a lot of soap, but you can use as much or as little water as you feel suitable. Wet the painted panel and cover with the soapy water. People who use this technique generally use washing up liquid. I guess this is the reason that we have never done this method because washing up liquid contains salts, and salts can cause rust and corrosion. Although speaking to people who use this method on a regular basis, they have not had troubles yet.
We know that years ago (decades ago) fitters were encouraged to fit O-rings to engines and other parts of the tractor using washing up liquid as a lubricant – it was readily available, and it does a great job of lubricating and allowing the O-ring to fit in place. However, many years later these fitters discovered increased rates of corrosion where this washing up liquid was used. Now, this may be because it was being used on bare metal. When floating decals onto the panels it is usually on a freshly painted surface, so maybe it is not a problem. Time will tell!!!
Apply the decal once you have removed the backing paper and float it into the correct position. Starting from the middle of the panel use the plastic card covered in a soft cloth to squeezy out the water and bubbles starting at the middle of the decal. You can have your friend or helper with the hairdryer ready to heat the decal slightly to get rid of the water from underneath the decal and to shrink the decal back slightly. I will say here just be careful how much you heat the decal as with all these things it is a fine line between shrinking and shrivelling up!!
You can use the card and cloth as well as the heat source to get rid of any creases and bubbles and to ensure that the decal is in the right place. You should be constantly referring to the dot marks that you have made along the length of the panel to position the decal correctly.
I know it sounds simple, but just give it a go
It may sound simple. You just mark it, apply soapy water to float it on and squeezy it out. Simple!
I know it is not that simple and it is a nerve-wracking job as you can see it so prominently on your newly restored Leyland. It puts the identity onto your Leyland tractor, so you want it to be right.
But don’t worry about it too much, just give it a go. We have spare decals if you make a mistake, and you can take it off and start again. Start with the rear cab decal and the long side panels as it will give you an idea of how the decals behave. It will also allow you to recognise where you need hands, and how many pairs of hand you need!
This blog may be a whirlwind stop through decals, all of which are printed in the UK by the way, but if you need more help with this then please feel free to contact us. We are here to help.